


Post by Creelien on Sept 13, 2019 8:21:04 GMT
Original post by King.Ikki
Tools needed:
- 3DS Max
- aman RE5 Mod Tool script
- RE5TriStrip
Now, I believe those who read this already got the base grip of unpacking and invalidating arc files. If you don't, please check it on Knowledge Base section.
Now, onto the fun section.
Steps:
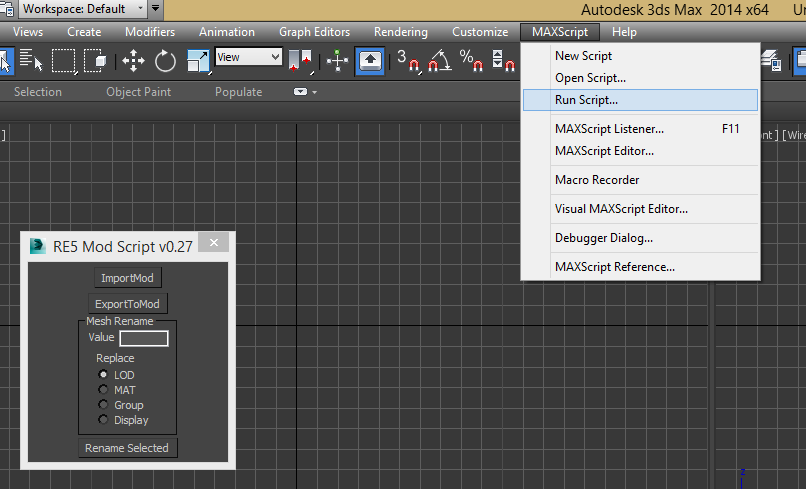
1. Open the script in 3DS Max (by dragging or using the "Run Script")
2. Press ImportMod and select mod file. In this example, I used pl000_02.mod, Nero's hair model file.
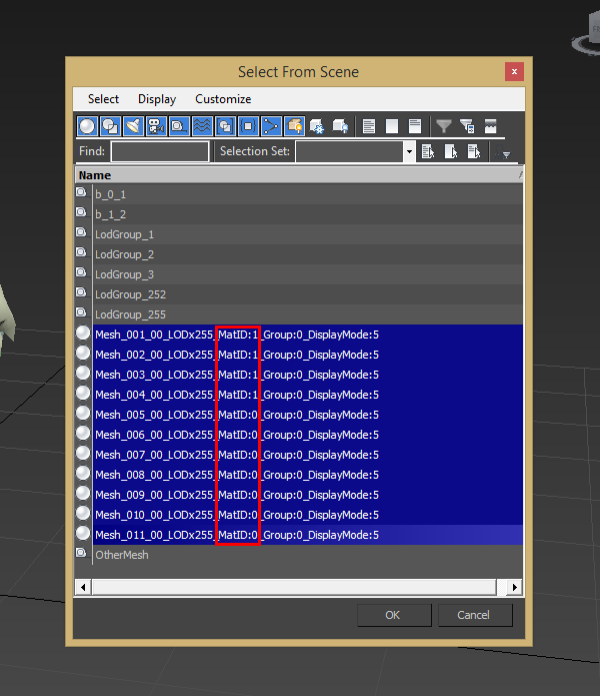
3. Different model have different number of mesh. Notice there are 11 meshes in hair model, and TAKE REAL NOTICE on the MatID.
Check the meshes (or click on available mesh on viewport) and see the MatID. This is due to the fact that MatID determines how the game views the mesh. Which in this case, setting MatID=0 shows in-game while 1 will make it transparent.
(If you are curious, you can see the mesh which have the MatID set to 1 (in the hair model). It will appear to be spline-like mesh, with no face. This is the way to check what MatID should you set.)
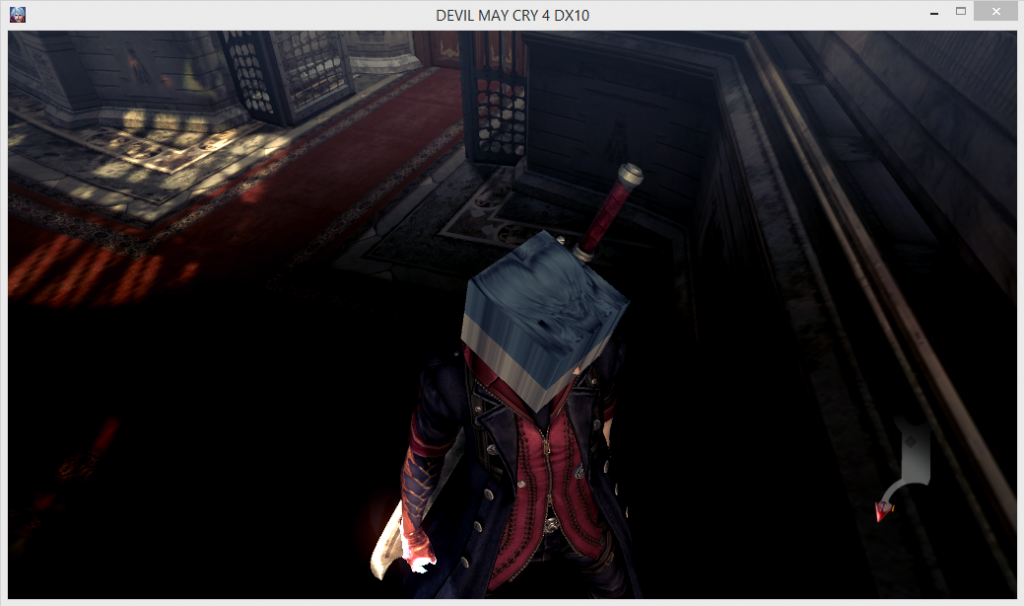
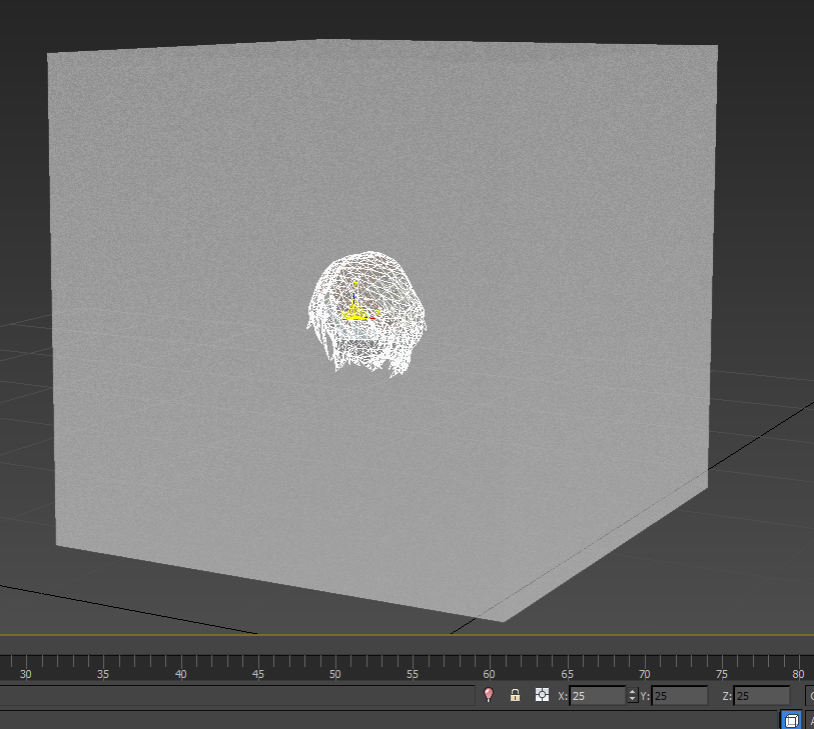
4. Load your replacement model. I used box.
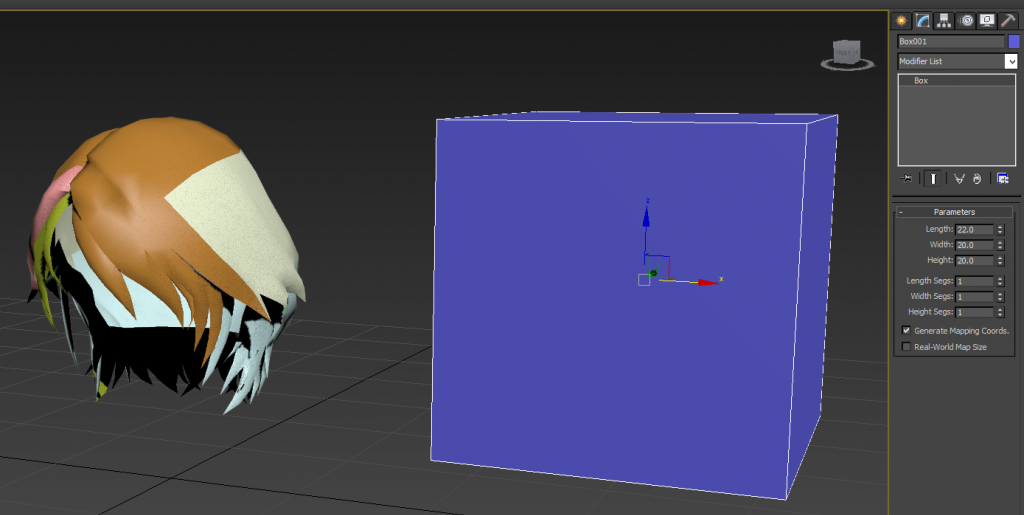
5. Align the replacement model, in terms of size, position and rotation.
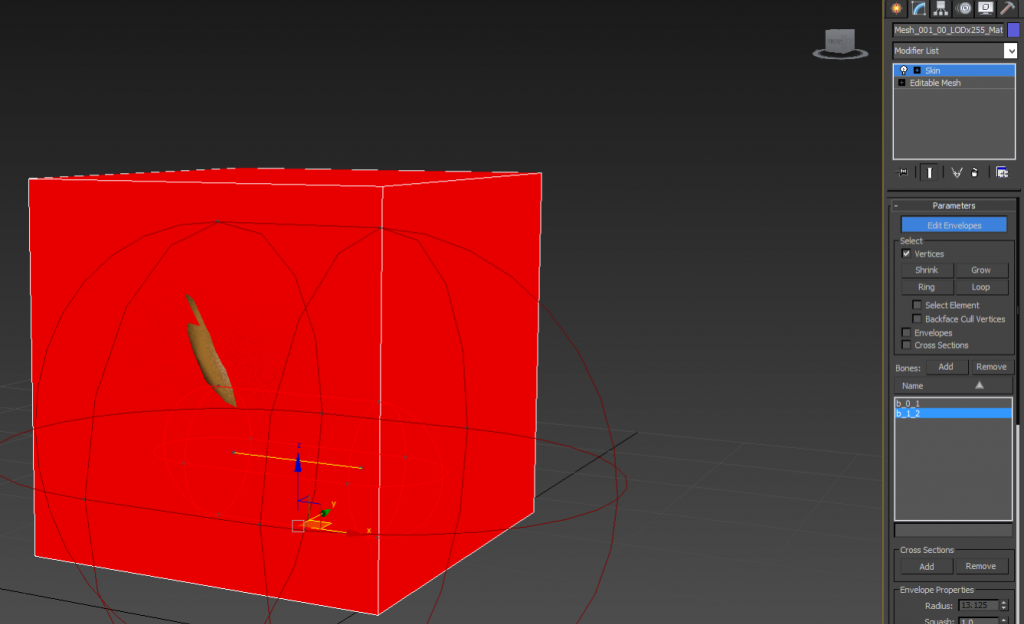
6. Now select any mesh from the hair model (in this case, first mesh) and copy the name. You MIGHT WANT TO CHECK the Skin modifier and see how each bone affect the vertices.
After that's done, you can delete this mesh or simply rename it to anything.
7. Paste the name on the replacement mesh. Set the MatID (refer to STEP 3).
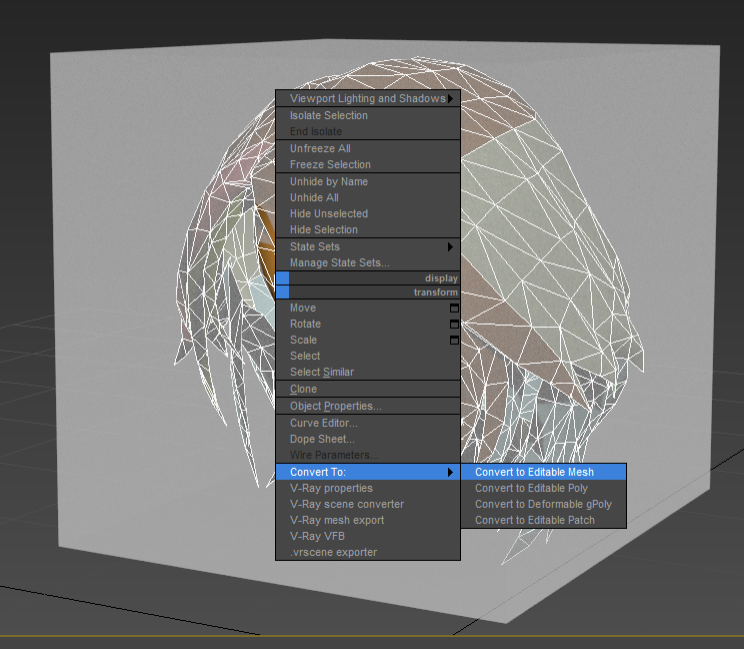
8. Convert the mesh to Editable Mesh (if it wasn't already). The script don't support other types.
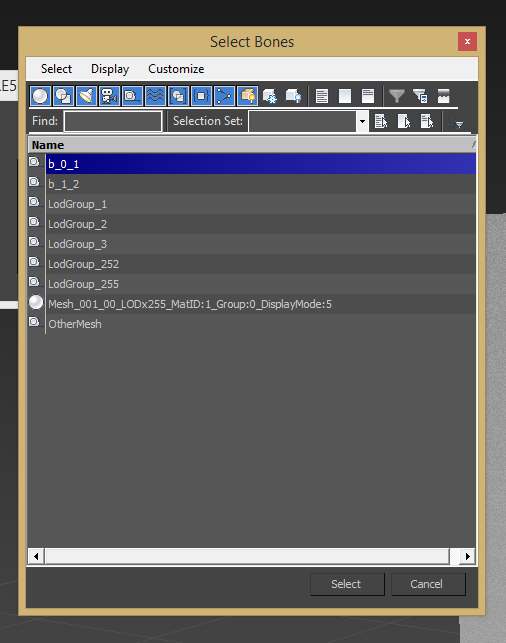
9. Add skin modifier. Add all the bones that comes with model. And set the bones weight accordingly, as you saw in STEP 6.
10. You've successfully replaced the one mesh in the model. Now, if you wish to replace another mesh, you can. But now, I'll just replaced one mesh. But, it's yet to be finished. We need to hide the other meshes first. To do that, you can either:
a)Set the MatID accordingly.
b)Hide the other mesh inside the new mesh or scaling it down.
c)Setting the LOD. (Thanks to AngryGhoust)
1. Rename the unwanted mesh to from **LODx255** to **LODx0**.
2. For example, "Mesh_003_00_LODx255_MatID:0_Group:0_DisplayMode:5" to "Mesh_003_00_LODx0_MatID:0_Group:0_DisplayMode:5".
3. PROFIT.
11. Now, select all the mesh that you wish to update (replace). Click ExportToMod and select the model you want to update (in this case, it's pl000_02.mod). Take note that this does not replace the .mod file, but instead created a .newmod file which you'll need to convert.
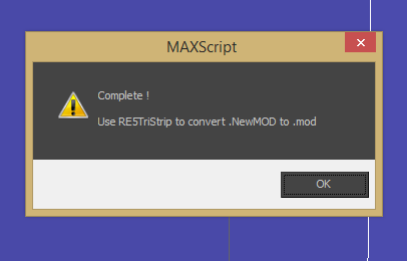
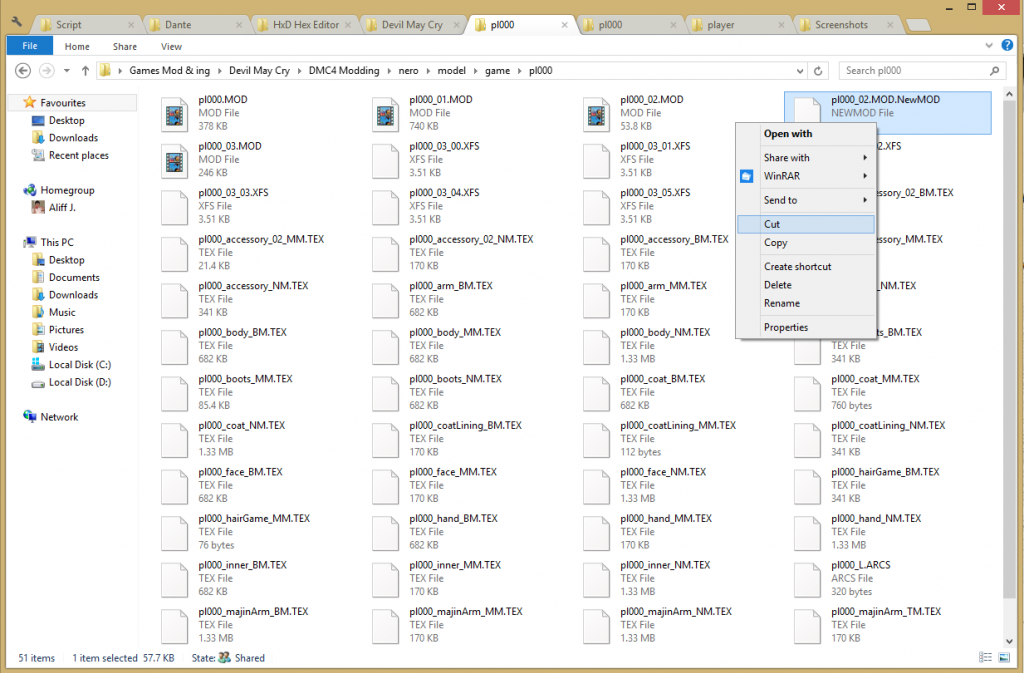
12. Take the .newmod file, cut it to the directory of RE5TriStrip and then drag the .newmod file to the executable (Or you can use the command line style, if you prefer that way). A file named pl0100.mod will be created.
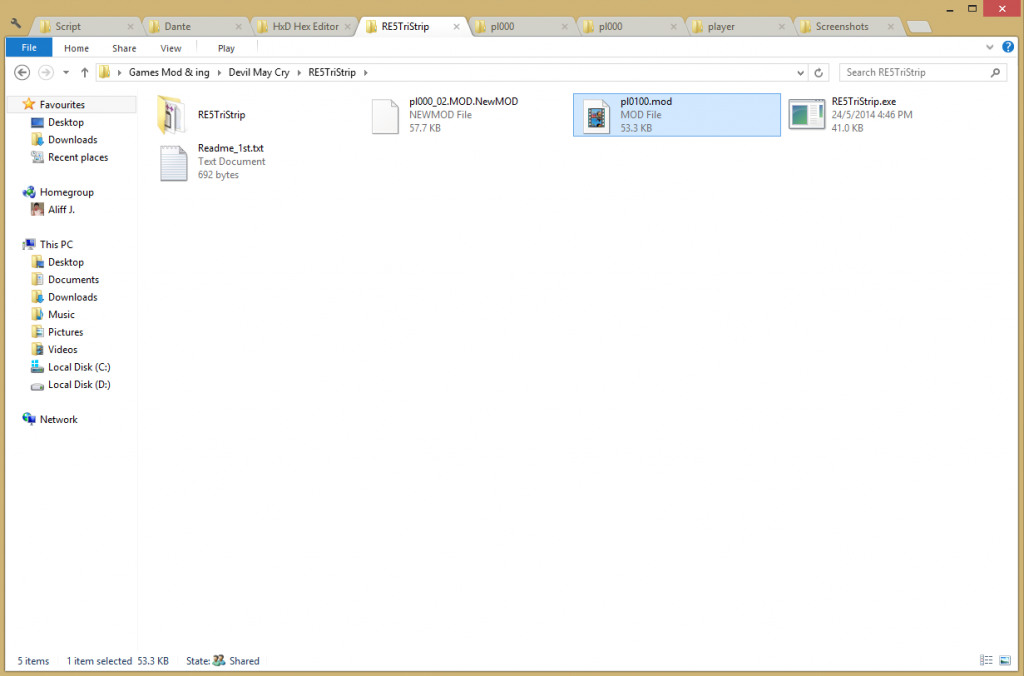
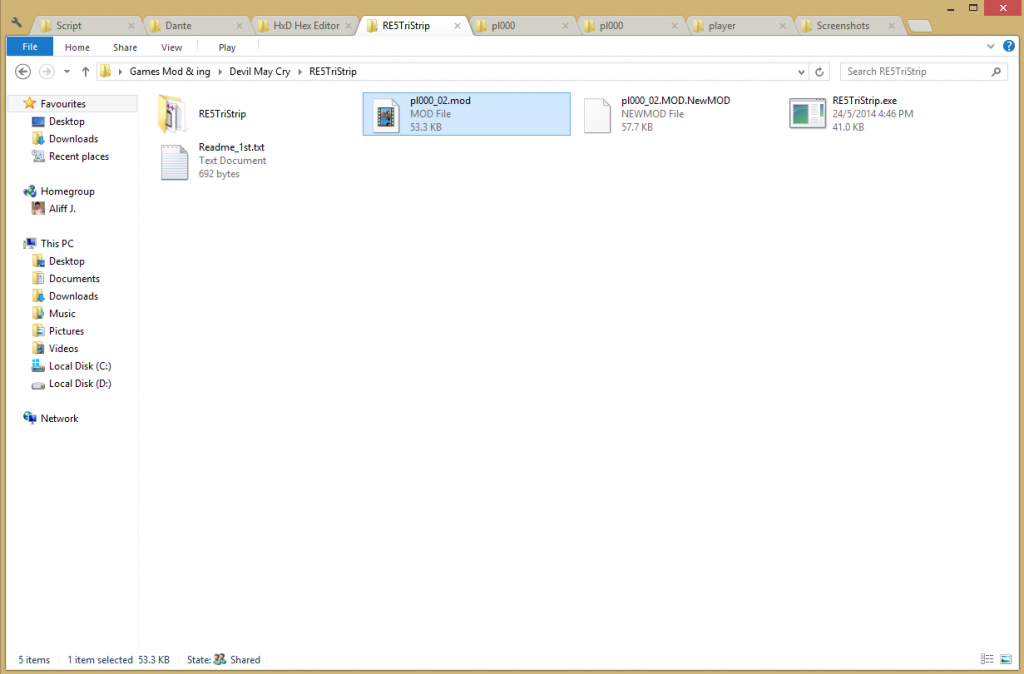
13. Rename the .mod file to the correct one, which in this case is pl000_02.mod. Then move it to correct directory.
14. PROFIT.
Things to note:
-MAKE BACKUPS!
-This does not seem to affect cutscenes. But that might be due to invalidation works.
-Different MatID have different texture map. In order to change texture, change the corresponding texture set (BM, MM, NM) with the replacement model's textures. Make sure the RESOLUTION for the texture is UNCHANGED.
-The MatID trick to hide away the meshes is due to the material's opacity set to 0 (game set). Therefore the MatID trick MIGHT BE INEFFECTIVE.
-b_0_1 is the base bone for every single model.
-The mesh must have Editable Mesh as its base and have Skin modifier applied (with bones set up) on top of it.
-There is an LOD Group set up, but it seems its not applied in DMC4 and models are just set up to LODGroup_255 (LOD Group 255 is for shadows). Anyone want to check this up in order to have cutscene model in close ups?
-There seem to be an easy way to set up the bones, that is to use Skin Wrap. But I have no idea on using that.
-I don't know whether we can add a custom meshes and add it instead of replacing mesh.
-Having texture/UV problem after exporting? Look here: RE5 mod tool topic
Aaaaaaand, it seems too long. Sorry, I tried to cut this off short but still, it's long.
Tools needed:
- 3DS Max
- aman RE5 Mod Tool script
- RE5TriStrip
Now, I believe those who read this already got the base grip of unpacking and invalidating arc files. If you don't, please check it on Knowledge Base section.
Now, onto the fun section.
Steps:
1. Open the script in 3DS Max (by dragging or using the "Run Script")
2. Press ImportMod and select mod file. In this example, I used pl000_02.mod, Nero's hair model file.
3. Different model have different number of mesh. Notice there are 11 meshes in hair model, and TAKE REAL NOTICE on the MatID.
Check the meshes (or click on available mesh on viewport) and see the MatID. This is due to the fact that MatID determines how the game views the mesh. Which in this case, setting MatID=0 shows in-game while 1 will make it transparent.
(If you are curious, you can see the mesh which have the MatID set to 1 (in the hair model). It will appear to be spline-like mesh, with no face. This is the way to check what MatID should you set.)
4. Load your replacement model. I used box.
5. Align the replacement model, in terms of size, position and rotation.
6. Now select any mesh from the hair model (in this case, first mesh) and copy the name. You MIGHT WANT TO CHECK the Skin modifier and see how each bone affect the vertices.
After that's done, you can delete this mesh or simply rename it to anything.
7. Paste the name on the replacement mesh. Set the MatID (refer to STEP 3).
8. Convert the mesh to Editable Mesh (if it wasn't already). The script don't support other types.
9. Add skin modifier. Add all the bones that comes with model. And set the bones weight accordingly, as you saw in STEP 6.
10. You've successfully replaced the one mesh in the model. Now, if you wish to replace another mesh, you can. But now, I'll just replaced one mesh. But, it's yet to be finished. We need to hide the other meshes first. To do that, you can either:
a)Set the MatID accordingly.
1. Set the MatID to (Refer to STEP 3).
2. PROFIT.
2. PROFIT.
b)Hide the other mesh inside the new mesh or scaling it down.
1. Select the other meshes and Convert to Editable Mesh.
2. Scale it down.
3. Add Skin modifier while all the meshes are still selected. Add the base bone, which is b_0_1 (I believe this is the same for every models).
4. Right-click the Skin modifier and click "Make Unique".
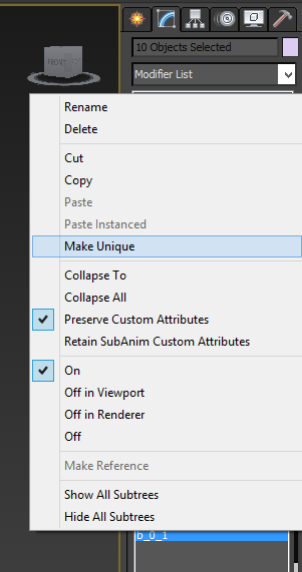
5. PROFIT.
2. Scale it down.
3. Add Skin modifier while all the meshes are still selected. Add the base bone, which is b_0_1 (I believe this is the same for every models).
4. Right-click the Skin modifier and click "Make Unique".
5. PROFIT.
c)Setting the LOD. (Thanks to AngryGhoust)
1. Rename the unwanted mesh to from **LODx255** to **LODx0**.
2. For example, "Mesh_003_00_LODx255_MatID:0_Group:0_DisplayMode:5" to "Mesh_003_00_LODx0_MatID:0_Group:0_DisplayMode:5".
3. PROFIT.
11. Now, select all the mesh that you wish to update (replace). Click ExportToMod and select the model you want to update (in this case, it's pl000_02.mod). Take note that this does not replace the .mod file, but instead created a .newmod file which you'll need to convert.
12. Take the .newmod file, cut it to the directory of RE5TriStrip and then drag the .newmod file to the executable (Or you can use the command line style, if you prefer that way). A file named pl0100.mod will be created.
13. Rename the .mod file to the correct one, which in this case is pl000_02.mod. Then move it to correct directory.
14. PROFIT.
Replacement model's UV/texture problem solution
Now, something will happen upon exporting if you are a unlucky. Something really bad. Like this: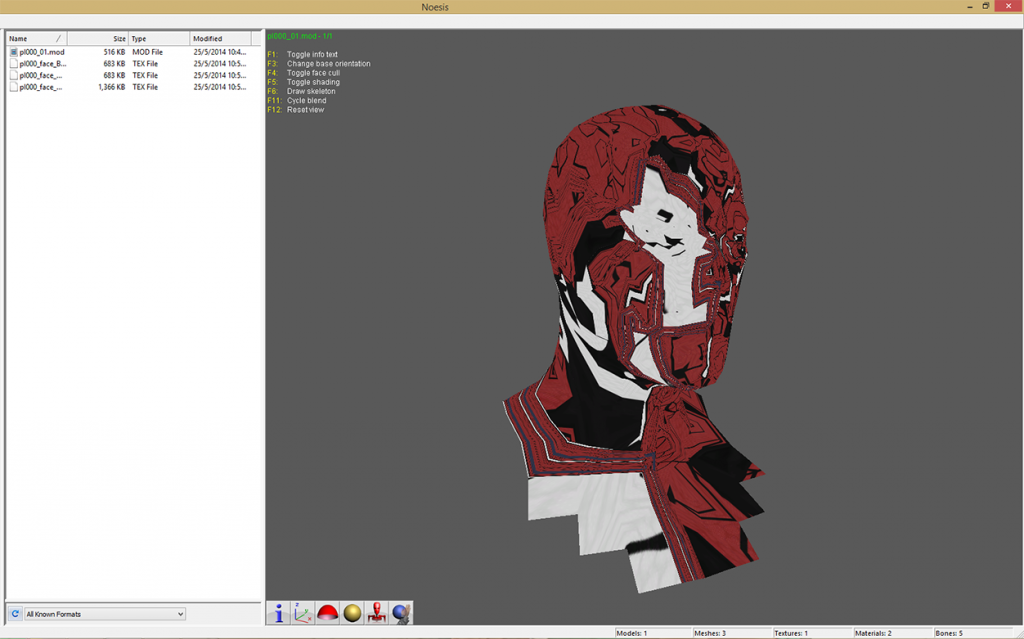
And this suppose to help you out, but if you don't quite understand it, you could follow this steps.
Steps:
1. Select the problematic mesh.
2. Export the mesh as .3ds (export selected). Tick the box when prompted (something like "Preserve UV").
3. Import the .3ds file back in.
4. Copy the skin modifier from the original mesh to the new, .3ds imported mesh.
5. Rename the new mesh imported and delete the old mesh.
Now, you can repeat that for each mesh, like a crazy guy who took to the sky to go near the sun.
Or you could select all the mesh, export those as one .3ds file, import it back in, then skin and rename them accordingly.
Things to note:
-MAKE BACKUPS!
-This does not seem to affect cutscenes. But that might be due to invalidation works.
-Different MatID have different texture map. In order to change texture, change the corresponding texture set (BM, MM, NM) with the replacement model's textures. Make sure the RESOLUTION for the texture is UNCHANGED.
-The MatID trick to hide away the meshes is due to the material's opacity set to 0 (game set). Therefore the MatID trick MIGHT BE INEFFECTIVE.
-b_0_1 is the base bone for every single model.
-The mesh must have Editable Mesh as its base and have Skin modifier applied (with bones set up) on top of it.
-There is an LOD Group set up, but it seems its not applied in DMC4 and models are just set up to LODGroup_255 (LOD Group 255 is for shadows). Anyone want to check this up in order to have cutscene model in close ups?
-There seem to be an easy way to set up the bones, that is to use Skin Wrap. But I have no idea on using that.
-I don't know whether we can add a custom meshes and add it instead of replacing mesh.
-Having texture/UV problem after exporting? Look here: RE5 mod tool topic
Aaaaaaand, it seems too long. Sorry, I tried to cut this off short but still, it's long.
